Introduction
Need a lengthy Ethernet? Simple instructions on how to create a Cat5e patch cable. Knowing how to create your own networking cables is not an exercise in practicality, but about saving money and being able to assemble your own cables in such a fashion that you have complete control over the length and quality of your cables. Being able to construct your own Ethernet cables will save you time, money and lead you to the exact kind of Ethernet cables you need, whether it is a home network you are building, an office setup, or a custom installation.
The ability to create customized networking solutions is particularly useful these days, when the world is becoming smaller. You may prepare a cable of the exact length you require, instead of having to be satisfied with a cable of standard length, either too long or too short. The DIY fashion also gives you a chance to study the fundamentals of the network infrastructure, which you are going to need in order to become more knowledgeable in troubleshooting connection issues and tweaking your network setup.
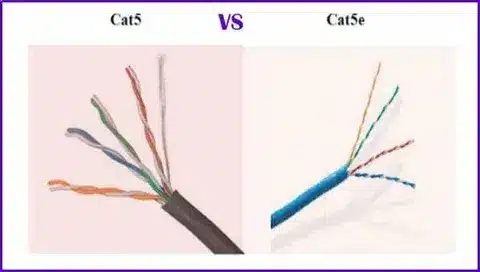
What Is a Cat5e Cable?
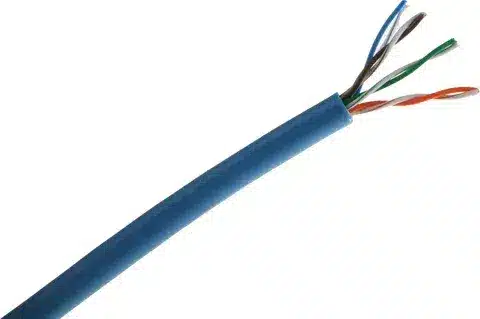
A Category 5 enhanced (Cat5e) Ethernet cable standard has a data transmission speed of up to 1 Gbps (1000 Mbps) and a frequency of up to 100 MHz. This is the latest Cat5 standard with superior specifications that reduce crosstalk and system noise, and suits most home networking and small office uses best.
Most commonly, Cat5e cables are used in homes and small businesses to connect equipment to routers, switches, and modems. These cables are used to access the internet, share files, streamline media, and other general network communications.
Cat5e offers better value to the standard networking requirements than other standards. Most common applications are made with Cat5e, but Cat6 cables are better where shorter installations and higher speed are desired (up to 250 MHz). Cat6a cables are more expensive and higher-performing, which is not essential on a fundamental level of networking performance.
Tools and Materials Needed
The following are some of the tools and supplies you need before beginning your Cat5e patch cable project:
Required Materials:
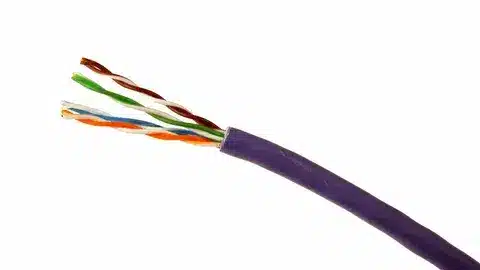
- Cat5e cable (bulk cable, usually sold by the foot or by spool)
- RJ45 connector (8P8C modular plugs)
- RJ45 crimping tool.
- Wire or cable jacket stripper.
- Cable tester (not mandatory, but strongly suggested during verification)
Additional Helpful Tools:
- Pointy cable cutters or scissors.
- Fine-tuning screwdriver.
- Cable identifier label maker.
When it comes to tool selection, invest in quality crimping tools since that is one of the primary factors contributing to your connection reliability. Find crimpers that have good guides and even systems. Where connectors are involved, use RJ45 plugs that are manufactured to fit a Cat5e installation – less expensive ones will be of lower electrical quality. Cable testers are optional but may save hours of troubleshooting by allowing an immediate check to determine if there are wiring errors/connectivity issues.
Step-by-Step Guide to Making a Cat5e Patch Cable
Step 1: Cable measuring and cable cutting.
Measure the patch cable you need and give it a few inches of allowance to consider termination and your routing needs. Straight line: Cable cutters cut across the end of the cable in a clean straight line.
Step 2: Strip the Outer Jacket
Using your wire stripper or a knife, slice the outer cable jacket off in a careful manner to avoid removing more than 1 inch of the jacket. If you nick or damage the insulation on the inside wire, it will cause difficulty in connection or signal loss.
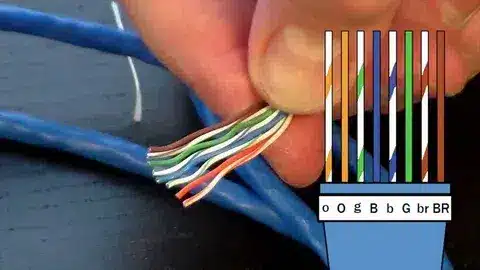
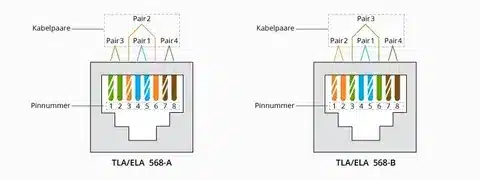
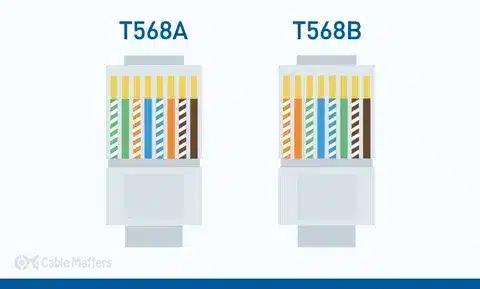
Step 3: Sort out Wire pairs in accordance with the T568B Standard
The Cat5e cable contains four pairs of wires, and they are twisted. Unwind those pairs gently, and place them on the T568B wiring standard:
- White-Orange
- Orange
- White-Green
- Blue
- White-Blue
- Green
- White-Brown
- Brown
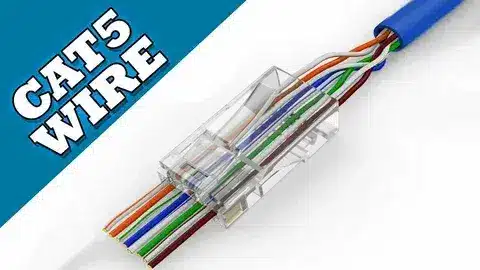
Step 4: Trim and Insert Wires
Cut all eight wires to an equal length and leave approximately half an inch between the jacket edge and the end. Gently place the wires into the RJ45 connector, trying to follow the order and pushing every wire to the front of the connector.
Step 5: Crimp the Connector
Take your connector that has the wires and put it into your criminal tool. Use constant, firm pressure in pushing the connector. This not only pushes tiny metal contacts onto every wire to create the electrical connection, but also the cable jacket.
Step 6: Test the Connection
You might also check all the connections you have, as long as you have a cable tester, to make sure no two of the wires are crossed or not connected. This will aid in preventing issues with networks before installation.
Understanding Wiring Standards: T568A vs. T568B
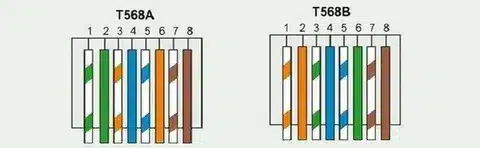
There are two types of wiring standards concerning Ethernet cables: T568A and T568B. The only difference is the location of the orange and green wire pairs.
T568B Standard (most common):
- More common in commercial and domestic applications.
- Fits well with the majority of current network infrastructure.
- Suggested where other installations are new.
T568A Standard:
- Common in government and in some home applications.
- Delivers the same performance as T568B.
- Not as widespread in business.
In patch cables, where either end is non-permanently attached to equipment, either will work provided that both ends are in the same configuration. However, T568B is common and is normally used. Uniformity- on one side of your cable, whatever you do on the other side of your cable, the cable does not fit.
Common Mistakes to Avoid
Wire Mismatch: To ensure that there is no signal degradation, it is important to ensure that the associations of the twisted pairs are not mismatched. Use as few and short pairs of wires as are practically feasible, since this maximizes crosstalk and minimizes performance.
Improper Insertion of Wires: It should be inserted via the connector and contact the front contacts. The installation of wires at an angle or ones that are not fully installed will give unreliable connections.
Poor Crimping: The amount of force used during crimping should not be too much to cause the connections to be loose in the short run, and also to be detrimental in the long run. Conversely, a connector or wire can be destroyed when it or they are overloaded.
Jacket Stripping Problems: It may be too little or too much outer jacket lost to create a problem. Almost any excess reveals unnecessary wire length, and too little reveals insufficient strain relief.
Troubleshooting Tips
A cable tester will tell you the state of all the wire connections when you test the completed cable. Successful connections are indicated by green lights or “PASS” lights, and problems that require attention are denoted by red lights or a “FAIL” message.
Common Issues and Solutions:
- Intermittent connections: Intermittent connections are often due to low crimping pressure or broken insulation on the wire.
- Complete connection failure: This is typically a sign of improper wiring sequence or entirely unconnected wires.
- Partial connectivity: May indicate that some or all of the wires are not seated correctly in the connector.
As long as there are challenges, you can re-grip the connector and restart the termination process. There are cases where the slight connection issue could be corrected by re-crimping, but cutting and re-terminating is the surest way to resolve the issue.
Conclusion
An example of some of the benefits of building your own Cat5e patch cables would include saving money, making patch cables of any length, and gaining a better understanding of the network infrastructure. This do-it-yourself approach puts you in full control of your own network, and you gain valuable technical skills that may come in handy when you need to hunt down bugs and in project development.
Despite the importance of attention to details, the process is easy once you understand the basics of the steps and standards. With good equipment and a little practice, you can create professional-grade network cables that will perform as well as store-bought cables.
Would you like to start creating your networking solutions? Attach the first Cat5e patch cable and feel how nice it is to create your own connectivity solution. You get the opportunity to exchange your experiences and any problems you might be facing- the networking community is effective when they share knowledge and solve problems together. The other method to deepen your knowledge in networking is by learning more about networking topology design, cable management best practices, and advanced troubleshooting and shooting techniques.